Earlier this week I posted a tutorial on how to make Fall gum paste leaves. I had used the Fall leaves for a cake I baked and decorated for the Daring Bakers Cake Challenge. I was 2nd runner up; I think the winning entry was spectacular! Congrats Katie!
Well today I would like to show you how to frost a 2 layer cake using my Fall cake as your guide. I am going to share with you some simple and practical tips so your cakes will look as good as they are to eat! I realize there are countless ways to frost and decorate cakes, I’m just sharing you mine. Keep in mind this is not a “How to decorate a cake” tutorial -this is a frosting tutorial (but I will give instructions on how to re-create this Fall cake below). So grab a mug of salted caramel hot chocolate and lets get this party started!
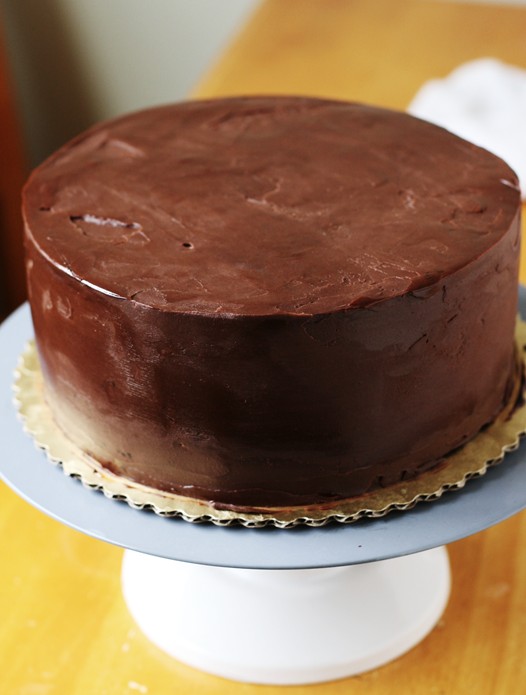
What you will need:
2 – 8 or 9″ cakes
1 cup of filling (jam, whipped cream, butter cream, ganache)
4 cups frosting (I do not recommend canned frosting)
offset spatula
pastry bag or ziplock bag
cake turntable or lazy susan *if you don’t have one, don’t worry.
cake board
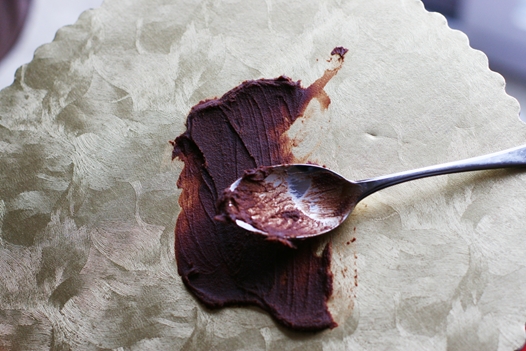
Step 1: In order for the top of your cake to be flat, you will want to trim off any “dome” type curvature to your cake. The best way to do this is with a bread knife and carefully trim the top off. Make sure when you cut the top off, you cut the top off level. If your cake has the opposite problem and is slightly caved it, leave it and fill it with frosting.
 –
–
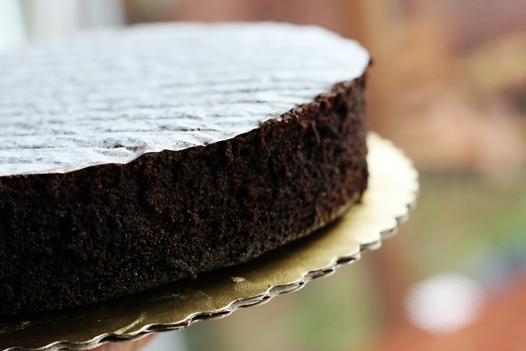
Step 2: Take a couple tablespoons of frosting and smear it on your plate or cake board. The frosting will act as a glue for the cake to rest on top of. Place one layer of the cake on top of the board making sure it is centered. I typically will place the top side of the cake downward on top of the cake board -this way I have a flat surface for filling the cake. Gently press the cake down.
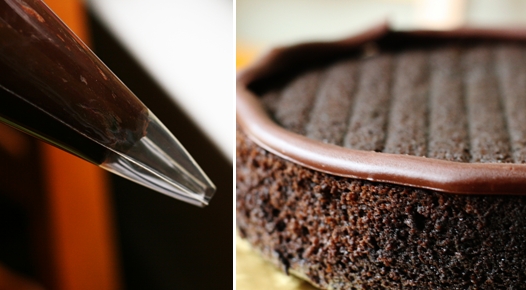
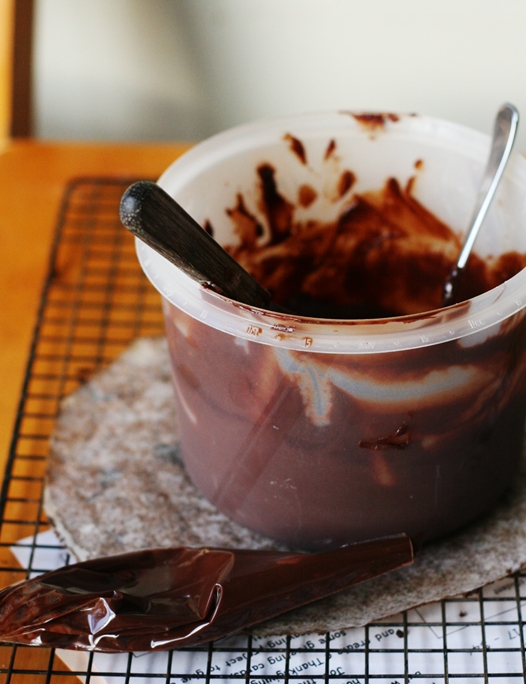
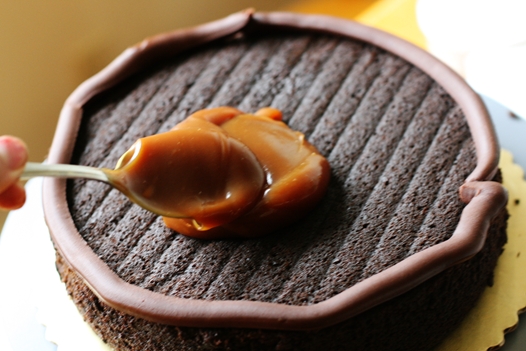
Step 3: Set the cake on a turntable (if you don’t have one just set it on a table). Fill a ziplock bag with the corner cut off or a pastry bag with frosting. You should use the same frosting you plan on using to ice the cake with. Carefully squeeze out frosting around the perimeter of the cake. You want to apply enough pressure so you get about 1/2″ pipe all around the cake. This is called a “dam”. There are 2 reasons for creating a dam. The first reason is to hold the filling inside the cake and to keep it from oozing out. The second reason is this. The dam will also help patch in any spots around the cake.
 –
–
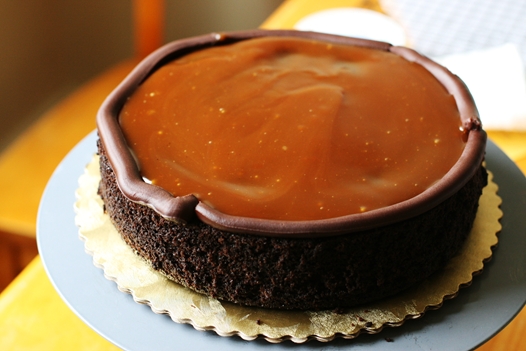
Step 4: Now that you have a dam around your cake, fill in the center of the cake with your choice of filling no higher than 1/4″. You could fill it higher, but you will need to make your dam higher as well. As you can see from my picture, I filled mine with caramel, leaving plenty of height in the dam so the caramel cannot ooze out.
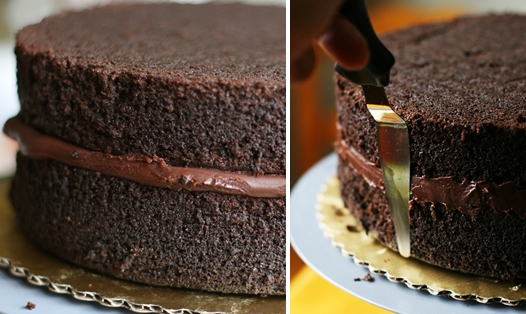
Step 5: Carefully set the top layer of the cake over the bottom layer. You will want the bottom side (how it was baked) facing up. This will help you frost the cake with a smooth surface. A great tip I learned many years ago is to use a flexible cutting board. – I bought mine at IKEA. From there you can slide the cake right on top of the other with much control. Once your cake is sitting on top of each other, bend down to eye level with the cake. Adjust the cake left or right to make sure it is as straight as it can be on all sides. Once you’ve adjusted it to your satisfaction, gently press the top of the cake down making it as level as possible. Using an offset spatula, drag the backside of it around the cake where the damn is. This will smooth out the filling area as well as fill any gaps.
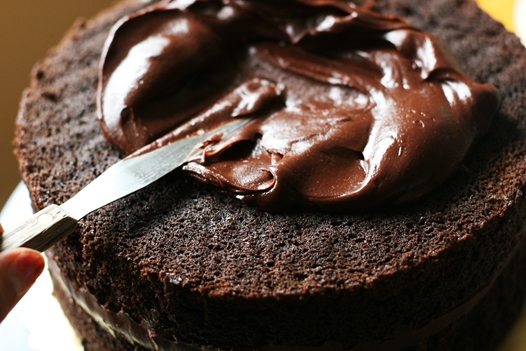
Step 6: Crumb coat. Some people like to brush any excess crumbs off with a pastry brush or by gently rubbing the palm of the hand around the cake. I typically do neither because I find the crumb coat takes care of any fly away crumbs. For the crumb coat, pour a cup of frosting on top of the cake. Start spreading the frosting all over the cake starting with the top and working your way down around the sides. What we want to do is trap any crumbs in the frosting so they will not show up when we do a final coat. The crumb coat should be a thin coat used to fill any gaps of cake with frosting. Using a clean offset spatula, smooth out (the best you can) the cake as pictured below. Stick your cake in the refrigerator to set up for 30 minutes to an hour.
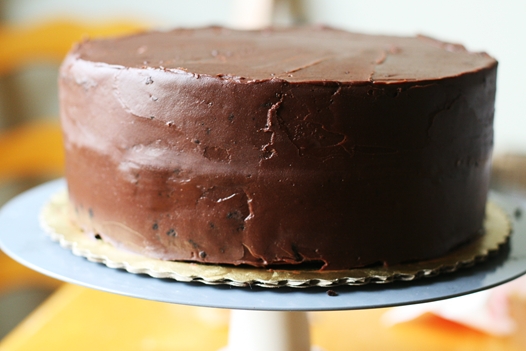
Step 7: Remove the cake from the refrigerator. When you gently touch your cake, no frosting should pull up. This is what you’re looking for. Next, place about 2 cups of frosting on top of the cake and start icing the cake from the top down adding more frosting as needed. To make crisp edges on top, take the edge of your spatula and drag the excess frosting on the edge inward towards the cake. Do this all around the cake. To smooth out the top, use the backside of your spatula in one direction- sweeping across the cake edge to edge. For smooth sides apply the backside of your spatula with gentle pressure and turn the turntable slowly. As you do this, your frosting will smooth out. Voila, it’s done! From there decorate your cake however you want.
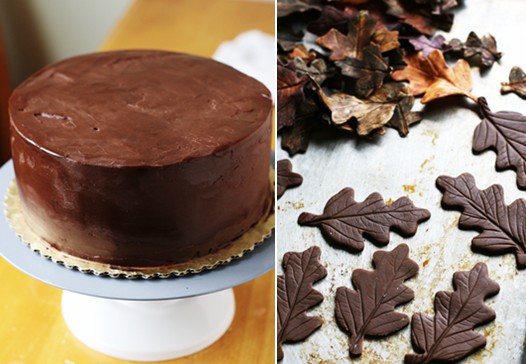
How to re-create my Fall Cake:
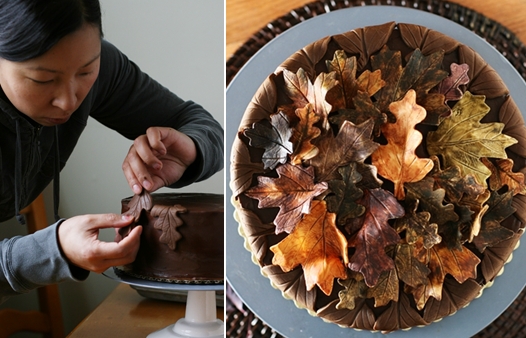
Frost and fill a 2 layer chocolate cake (if you use this chocolate cake recipe, make sure you adjust your baking time to 40 minutes or until done). I filled mine with homemade caramel sauce and used ganache as the frosting. Cover the outside perimeter with chocolate fondant leaves (pictured above) and randomly cover the top with gum paste leaves. You can find the tutorial I did for the gum-paste and fondant leaves here. Just make the fondant leaves the same way, except prepare the fondant leaves right before you are ready to decorating.. otherwise they will dry out and leave a crackly leather type texture when they bend.
I would like to share some thoughts with you about equipment. These are merely suggestions which will make your life easier.
EQUIPMENT:
CAKE PANS:
If I were to recommend a couple of cake pans to you, I would suggest a 6″ round and a 8″ or 9″ round. Here is my logic. 6″ round cakes are the perfect size for a family birthday cake. The more cake you make, the more there is too eat. A 6″ cake can easily feed a group of up to 10. As for whether to purchase a 8″ or 9″, it is a matter of preference. Both sizes could feed a crowd of 12-18 people for a birthday party. The type of pans you should look for have a 90 degree edge from the base to side. Some cake pans you can purchase in the grocery stores have slightly slanted sides. I DO NOT recommend these types of pans as it will make frosting your cake very difficult because you will have to try and compensate straight sides with frosting. Wilton cake pans can be easily found online or at craft stores like Michaels.
SPATULAS:
Offset spatulas are your best friend when it comes to icing a cake. There are several types out there. As to which one to pick is also preference. The taller ones are really only used for tall cakes or for smoothing out tops of cakes in one swoop. I personally find them slightly awkward to handle but if I’m baking a very tall cake, they are the most useful and helpful. My personal favorite is the straight 4.5″ blade. It is small and very easy to maneuver and for a few bucks, well worth its price.
CAKE TURNTABLE OR LAZY SUSAN:
I will not lie to you. These can be expensive depending on the type you buy. At the same time, I find a cake turntable to be very helpful when icing the sides of cakes. If you plan on baking cakes occasionally, I would recommend a lazy Susan which can be purchased very inexpensively. If you plan on baking and decorating cakes often, buying a nicer one will help you achieve the results you are looking for more easily. The reason is the “glide” factor. The pedestal type just glide and maneuver better – not to mention they are propped up higher making it easier to smooth icing. YOU DON’T need to buy any sort of turntable to decorate a cake. However, when you’re icing sides smoothly, the momentum of a turning cake with a spatula smoothing the sides is what helps it look flawless and flat.
PASTRY BAGS:
I love pastry bags – can’t get enough of them! However if you’re not going to be piping any decorations, a ziplock bag will do for getting a nice dam around your cake. However, disposable cake bags are cheap and handy to have when you want to decorate with multiple types of colored frosting.
OTHER THINGS:
Parchment paper – I only bake with parchment paper. It is my sure fire guarantee my cake will release from the pan without sticking to it.
Cake tips: If you are going to pipe borders, roses, letter writing, and other detail work, cake tips are a must. You can buy them individually or buy them part of a set.
Cake boards: Most of the time when decorating and presenting a cake, you will want the board it sits on underneath to be slightly wider than the cake itself. You can buy cardboard cake boards for this purpose which are already foil- lined. Or you can make your own buy cutting a piece of thick ( think card board box) card board the diameter slightly wider than your cake and cover it with tin foil taping the edges on the backside down.
[print_link]
*If you have any questions, cake decorating tips, comments, or other suggestions for cake decorating tutorials you would like to see drop a comment. I plan on doing more tutorials in the near future.

Our whole family would like to thankyou for given this amazing awesome recipe. It was marvelous!!!!!
Hi, if you use a cake plate underneath your cake , use a spatula to lift it off the lazy susan.
Hi,
If you use a cake plate underneath your cake, use a spatula to lift it off.
Thank you, your tutorial was great and I LOVED learning how to make the leaves!
Hi. I would like to have your Chocolate Cake recipe, but the link above directs me to ebay. Can you please send it to me?