Not a week goes by where I don’t have a brief conversation with my husband about how much our kids have grown. These conversations are 1 part disbelief, 1 part sadness, and a lot of awareness my kids are growing up whether I like it or not. I’ve been blogging for much of their youth and although we still cook and bake in the kitchen together, it’s not the same as when the kids were really young. Savory Sweet Life is a food blog full of recipes for people to enjoy, but Savory Sweet Life to me is very much my family food journal full of memories, photos, videos, and recipes I look back to with tremendous fondness knowing someday my kids will read the archives with an emotional connection to their own youth and our time spent together. I might be a terrible scrapbooker in real life but I’ll always have Savory Sweet Life to remember our times in the kitchen.

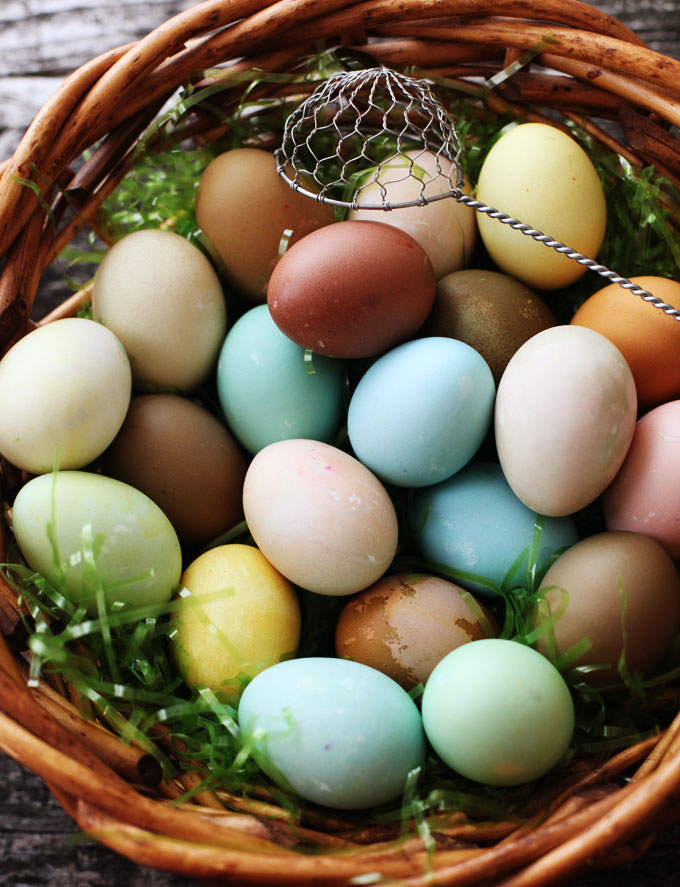
Dye Easter eggs naturally using onion skins, red cabbage, raspberries, spices, and other items in your garden or pantry is a great alternative than the commercial dye kits or food coloring.
- Red cabbage blue
- Turmeric yellow
- Red onion skins red
- Spinach green
- Crushed red raspberries pink
- Coffee brown
- Beets pink or maroon
- Water
- 1 tablespoon of vinegar per cup of dye
- baking soda optional
- White or brown hard boiled eggs
- optional: oil
- For two cups of dye, you will need one cup of raw food with the exception of the turmeric
- (1/4 cup) and coffee (use as is).
- Chop each of the vegetables or skins.
- Bring different pots of water to boil and add the chopped ingredient.
- Allow the water to boil for five minutes before turning off the heat.
- Allow the water to cool in the pot until room temperature, at least one hour.
- Strain the water using a fine mesh strainer.
- Add one tablespoon of vinegar to each cup of dye.
- Dip the eggs in enough dye so the egg is covered.
- Allow the eggs to rest in the dye long enough until your desired intensity of color.
- Some colors take longer than others to adhere and may require to sit in a color bath overnight in the refrigerator.
- Dry the eggs and store in the original egg crate.
- For a glossier egg, buff and shine each egg with a little bit of oil on a paper tower.
- Finished eggs should be refrigerated until ready to eat.
If I sound emotional and dramatic it is because I am. A couple weeks ago our family flew down to Southern California to visit colleges for both my daughters to tour and as a parent who would love nothing more than my kids to live at home as long as possible, the reality of them moving out in the near future is approaching. Just the thought of this while typing makes me teary. We are a close family and my older daughter tells her friends a lot how she and I are “super tight.” The last 9 years I’ve been writing I’ve strived to be respectful of how much and how little I share online about my kids knowing they will someday look through these pages and read them.
What does any of this have to do with how to dye Easter eggs naturally?
Nothing except I’m feeling sentimental and vulnerable. I’ve been looking at old photos and watching videos from a few years ago like so many of us parents do as we have this internal dialogue with ourselves about how we wish there was some magical way we could keep our kids from growing up while simultaneously replaying certain moments from their childhood in our minds.
This recipe was initially published on PBS Parents but I’m selfishly reposting the method on how to dye Easter eggs naturally here on Savory Sweet Life along with the video we made as a family journal entry for us to enjoy for years to come.
For those of you interested in this method I will add my own observations. Dying Easter eggs naturally requires patience because for some of the colors it takes a lot longer than others to adhere to the eggs. But the end result is absolutely gorgeous and beautiful. And maybe if you are looking to create an Easter memory with your loved ones, dying eggs this way is a memory worth making.

Leave a Reply